Classic Chevy brake problems most often involve pulling to one side, a soft or spongy pedal, a hard pedal, brake fade, or visible fluid leaks. These issues usually stem from aging components, drum brake design limits, or a lack of regular use. Addressing classic Chevy brake problems early helps preserve stopping ability and overall driving safety.
Why Brake Issues Are Common in Classic Chevys
Classic Chevrolets from the 1950s through the early 1970s were built around braking systems that reflected the technology of their time. Even when well maintained, they behave differently from modern vehicles—and age only amplifies those differences.
Aging Components
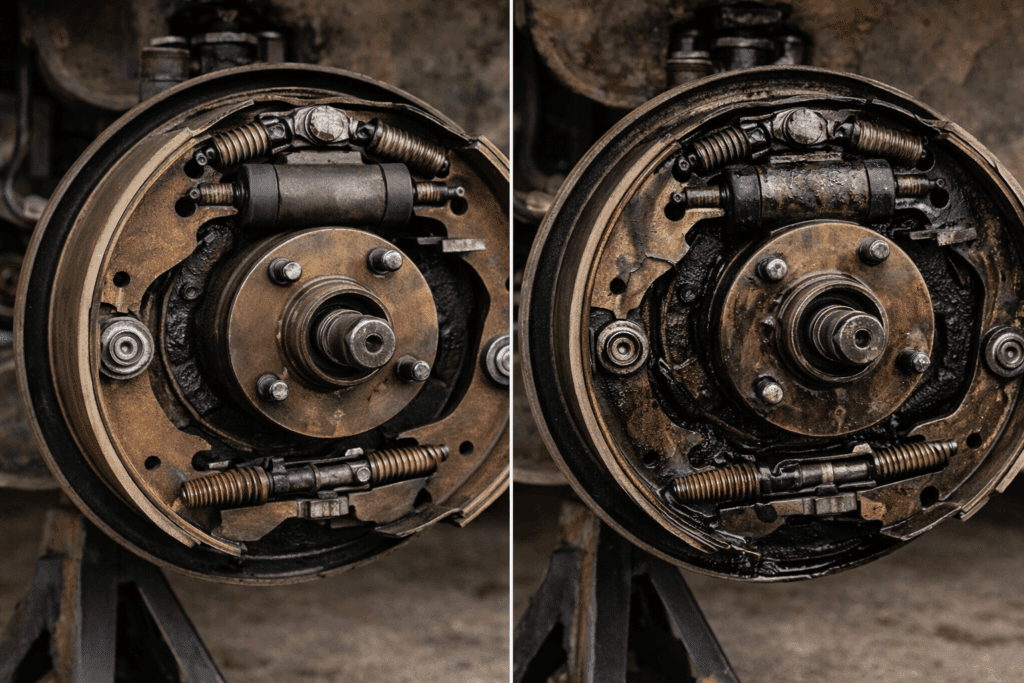
Most original-style brake systems rely on rubber hoses, wheel cylinder seals, master cylinder cups, and steel lines that degrade internally long before they fail visibly. A car may “look fine” underneath yet still suffer from restricted fluid flow, internal leaks, or uneven pressure.
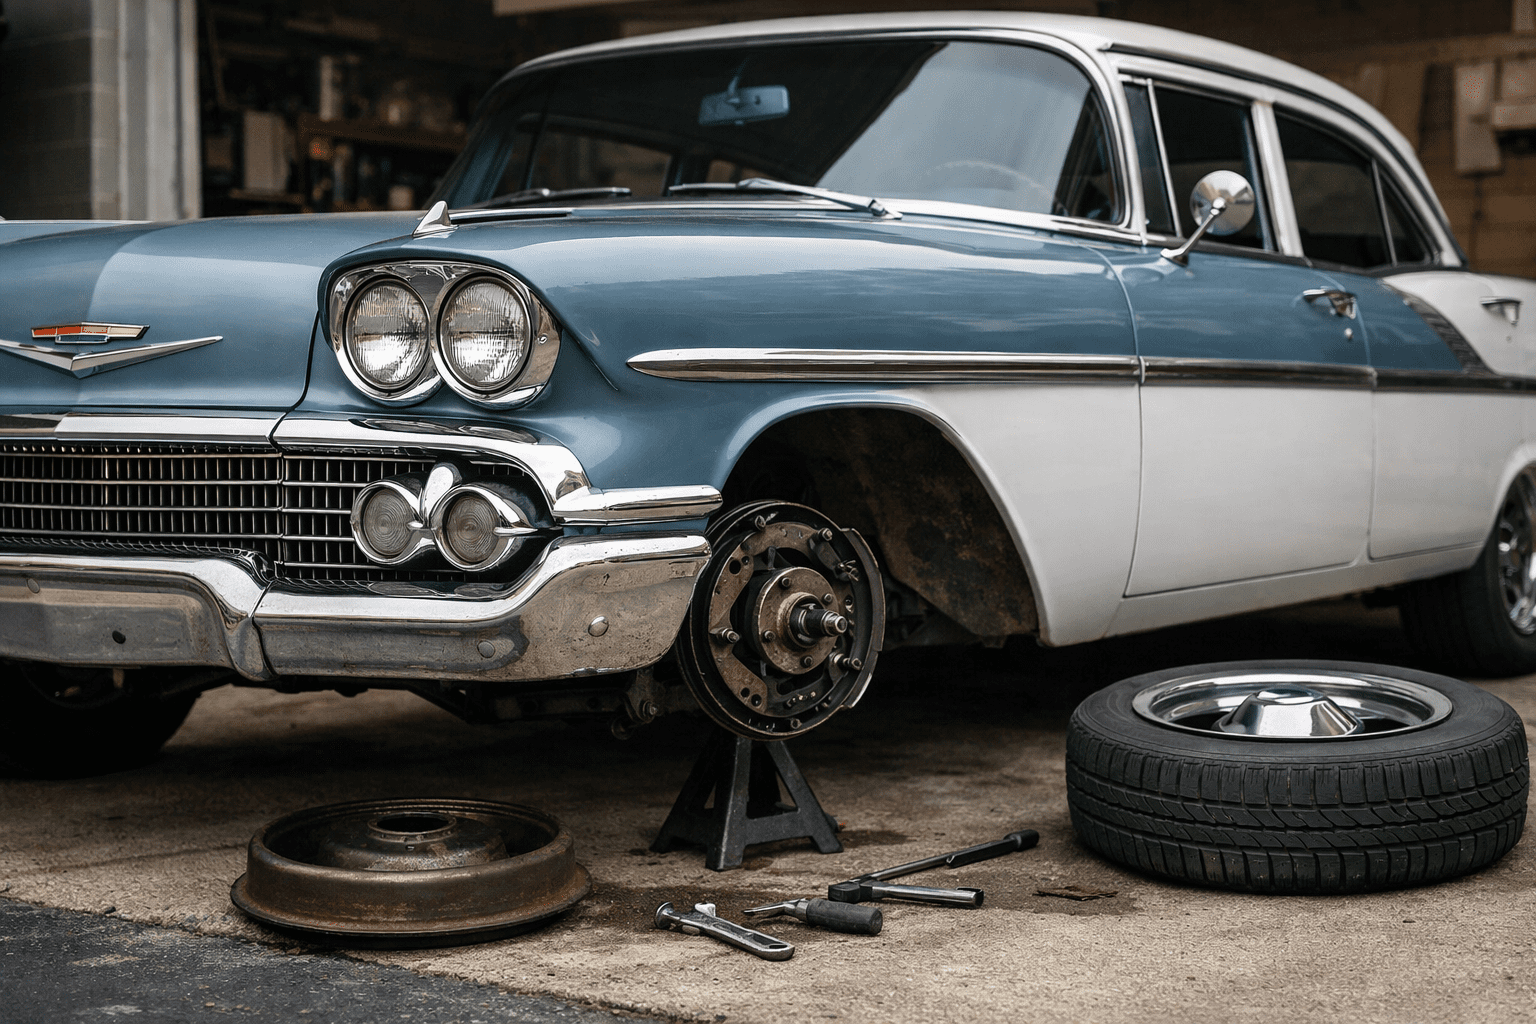
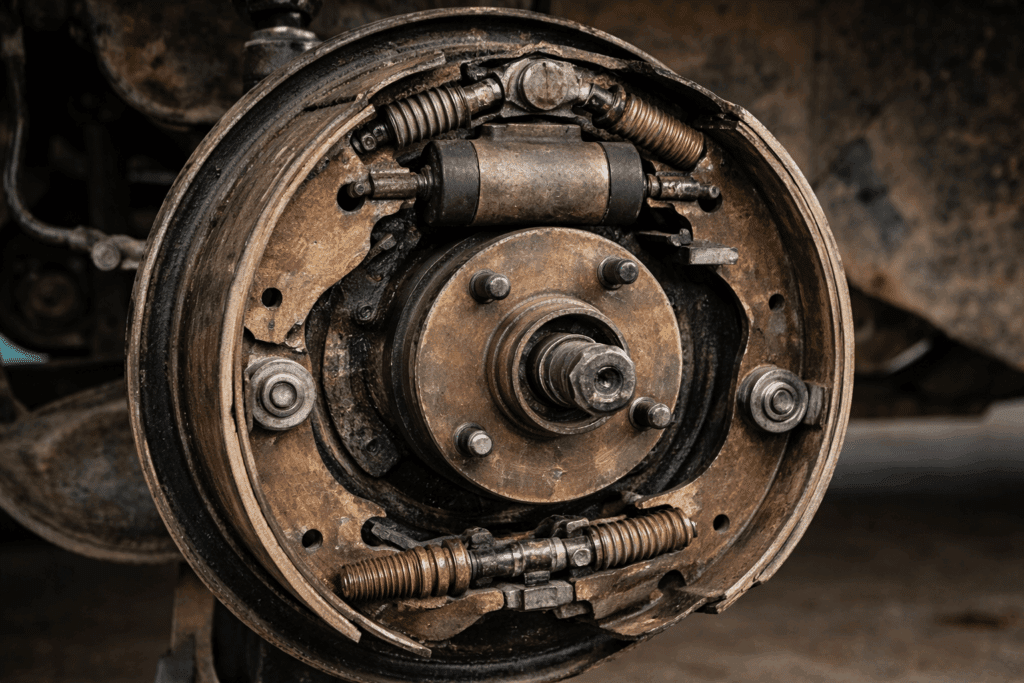
Drum Brake Limitations
Many classic Chevys use four-wheel drum brakes or front drums with rear drums. Drum brakes are sensitive to adjustment, heat, and contamination. They also rely on mechanical self-adjusters that often stop working after decades, leading to inconsistent braking.
Sitting vs. Driving Effects
Cars that sit for long periods often develop more brake problems than those driven regularly. Moisture accumulates in brake fluid, seals dry out, wheel cylinders corrode, and drums rust internally. Ironically, a rarely driven classic Chevy can be less reliable under braking than one that sees weekly use.
Most Common Classic Chevy Brake Problems
Pulling to One Side
A classic Chevy that pulls left or right under braking usually has uneven braking force between the front wheels. This is one of the most common complaints about drum-brake cars.
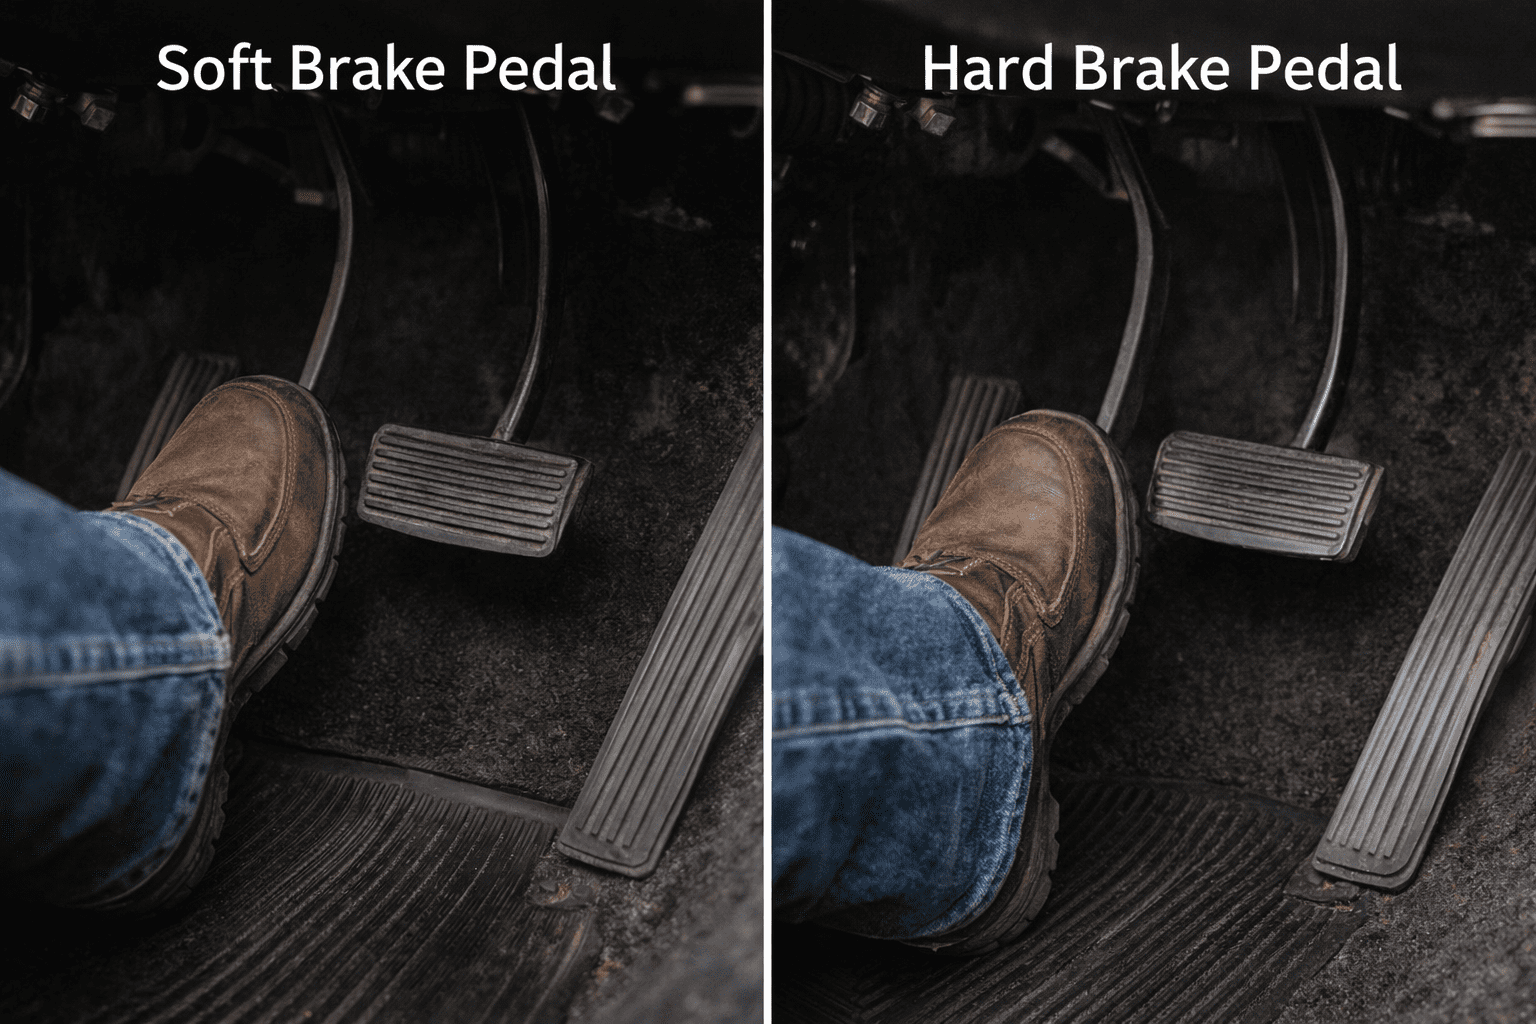
Soft or Spongy Brake Pedal
A soft pedal that travels farther than normal indicates compressible fluid or movement in the system where there shouldn’t be any.
Hard Brake Pedal
A hard pedal requires more effort to stop the car and often feels like the brakes are not “biting,” even though the pedal itself feels firm.
Brake Fade
Brake fade occurs when braking power decreases after repeated stops or downhill driving. The pedal may feel normal, but stopping distances increase.
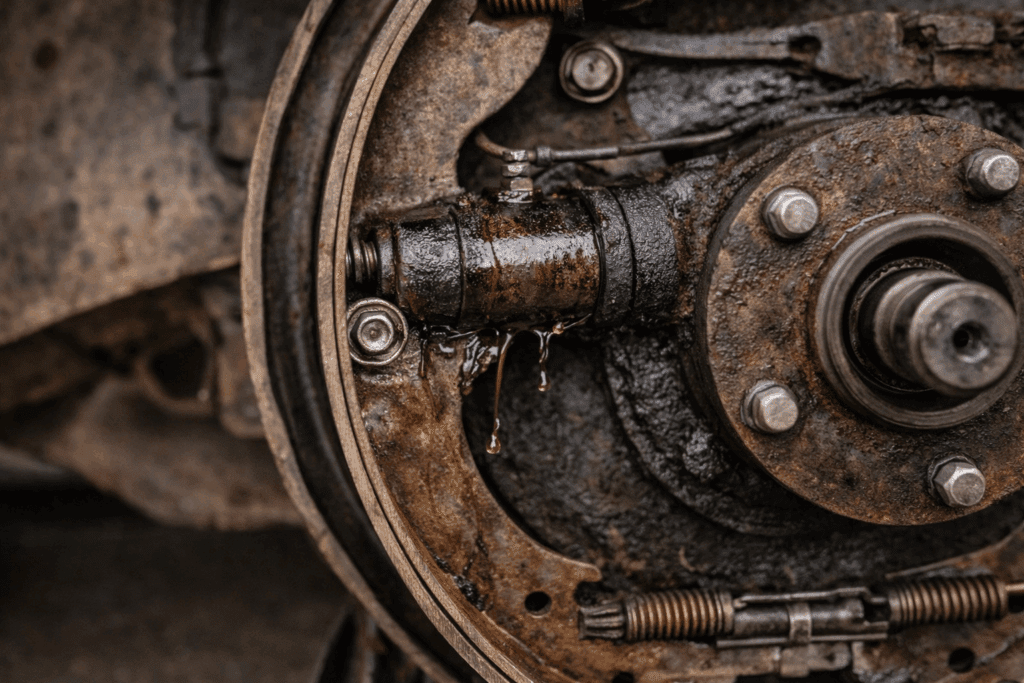
Brake Fluid Leaks
Leaks can occur externally at wheel cylinders, calipers, hoses, or internally inside the master cylinder, often without obvious puddles under the car.
How to Diagnose Each Brake Problem
Pulling to One Side
- What the driver feels: The car darts left or right during braking, especially at low speeds.
- What to check first: Front wheel cylinders or calipers, shoe adjustment, contaminated linings.
- What usually isn’t the cause: Tire alignment or steering components, unless the pull only occurs without braking.
Soft or Spongy Pedal
- What the driver feels: Excessive pedal travel, delayed braking response.
- What to check first: Air in the lines, deteriorated rubber hoses, and rear drum adjustment.
- What usually isn’t the cause: Worn pads or shoes alone rarely cause a spongy pedal.
Hard Pedal
- What the driver feels: Firm pedal but poor stopping performance.
- What to check first: Power booster operation (if equipped), vacuum supply, blocked hoses.
- What usually isn’t the cause: Brake fluid level, unless the system is nearly empty.
Brake Fade
- What the driver feels: Brakes work initially, then lose effectiveness with repeated use.
- What to check first: Drum condition, shoe material, glazing, and brake fluid age.
- What usually isn’t the cause: Single component failure—fade is usually systemic.
Fluid Leaks
- What the driver feels: Gradually sinking pedal, need to pump brakes, or sudden loss of braking.
- What to check first: Backing plates (for wheel cylinder seepage), master cylinder rear seal, rubber hoses.
- What usually isn’t the cause: Calipers alone—many leaks occur where they’re hard to see.
How to Fix or Improve Each Issue
Pulling to One Side
- Fix: Clean or replace wheel cylinders/calipers, replace contaminated shoes, and adjust drums evenly.
- Cost range: $150–$400 per axle.
- DIY difficulty: Moderate; requires proper adjustment and bleeding.
Soft or Spongy Pedal
- Fix: Replace rubber hoses, bleed the system thoroughly, and adjust the rear drums correctly.
- Cost range: $100–$300.
- DIY difficulty: Moderate; bleeding technique matters.
Hard Pedal
- Fix: Repair or replace the brake booster, check the vacuum source, and verify pedal ratio.
- Cost range: $200–$600.
- DIY difficulty: Moderate to advanced, depending on setup.
Brake Fade
- Fix: Replace shoes with quality linings, resurface or replace drums, and flush old fluid.
- Cost range: $200–$500.
- DIY difficulty: Moderate.
Fluid Leaks
- Fix: Replace leaking wheel cylinders, hoses, or master cylinder.
- Cost range: $150–$500, depending on the extent.
- DIY difficulty: Moderate; safety-critical work.
Drum Brakes vs Disc Brakes: Real-World Expectations
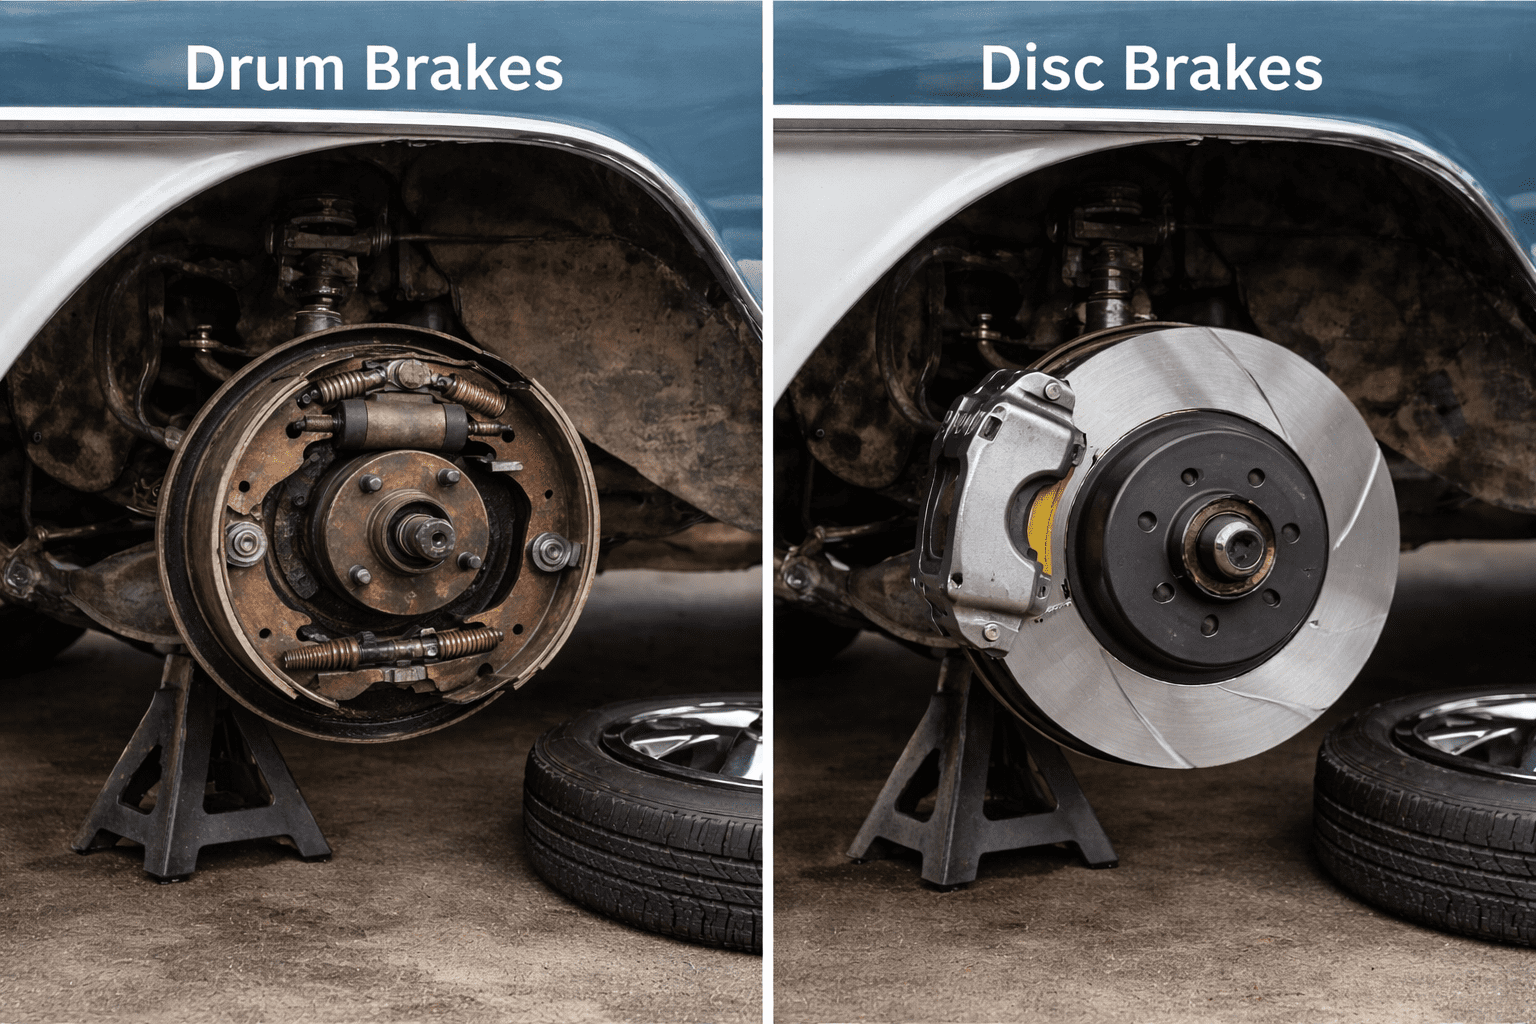
Drum brakes can work reliably when properly adjusted, but they require more maintenance and offer longer stopping distances. A well-sorted four-wheel drum setup may stop a 1960s Chevy from 60 mph in roughly 180–200 feet.
Early front disc conversions typically reduce that distance by 20–30% and offer more consistent braking, especially during repeated stops. However, discs don’t eliminate maintenance—they shift it toward calipers, pads, and proportioning valves.
For owners considering upgrades, see Disc Brake Conversion Kits for Classic Chevys.
Common Brake Mistakes Owners Make
- Mixing old and new parts: New shoes with old drums or new calipers with original hoses often create imbalance.
- Ignoring rubber lines: Hoses can collapse internally while looking fine externally.
- Poor bleeding technique: Incomplete bleeding mimics major failures and leads to misdiagnosis.
When to Stop Driving and Get Help
Stop driving immediately if:
- The pedal suddenly sinks to the floor
- Brake warning lights (if equipped) stay on
- Fluid level drops repeatedly
- The car pulls violently under braking
Brakes are not a “drive-it-home” system on classic cars—small failures can escalate quickly.
FAQs
Are classic Chevy drum brakes unsafe?
No. Properly maintained drum brakes are safe within their design limits, but they require more frequent inspection and adjustment.
Why does my classic Chevy stop fine cold but poorly when hot?
That’s classic brake fade, often caused by drum heat buildup or glazed linings.
Should I convert to disc brakes?
If you drive regularly in traffic or hills, discs improve consistency. If originality matters, drums can still perform reliably.
How often should brake fluid be changed?
Every 2–3 years, even on low-mileage cars, due to moisture absorption.
Classic Chevy Brake Problems
Classic Chevy brake problems are rarely mysterious—they’re usually the predictable result of age, design limits, and deferred maintenance. Whether running drums or early discs, consistent inspection, correct adjustment, and realistic expectations are the key to long-term braking reliability. Addressing issues methodically keeps these cars safe, enjoyable, and trustworthy for years to come.
For broader ownership planning, see Classic Chevy Buyer’s Checklist and Classic Chevy Restoration Costs.