Restoring a classic Chevy isn’t just about what’s under the hood. The interior defines how authentic, comfortable, and valuable your car feels. Whether you’re planning a Chevy interior restoration on a weekend driver or preparing a show-level build, tackling the seats, dash, and trim brings your project to life.
Step 1: Assessing Your Interior
Before tearing anything apart, do a full inspection of your cabin. Check for cracked vinyl, faded dash pads, or missing chrome. Create a checklist of what can be cleaned and reused versus what requires replacement.
If you’re unsure about originality, resources like the Interior Restoration Tips for Bel Airs and Impalas and Step-by-Step Classic Chevy Engine Rebuild Basics walk you through what collectors and enthusiasts look for. Photos before disassembly will also make reassembly easier.
Step 2: Chevy Seat and Upholstery Restoration
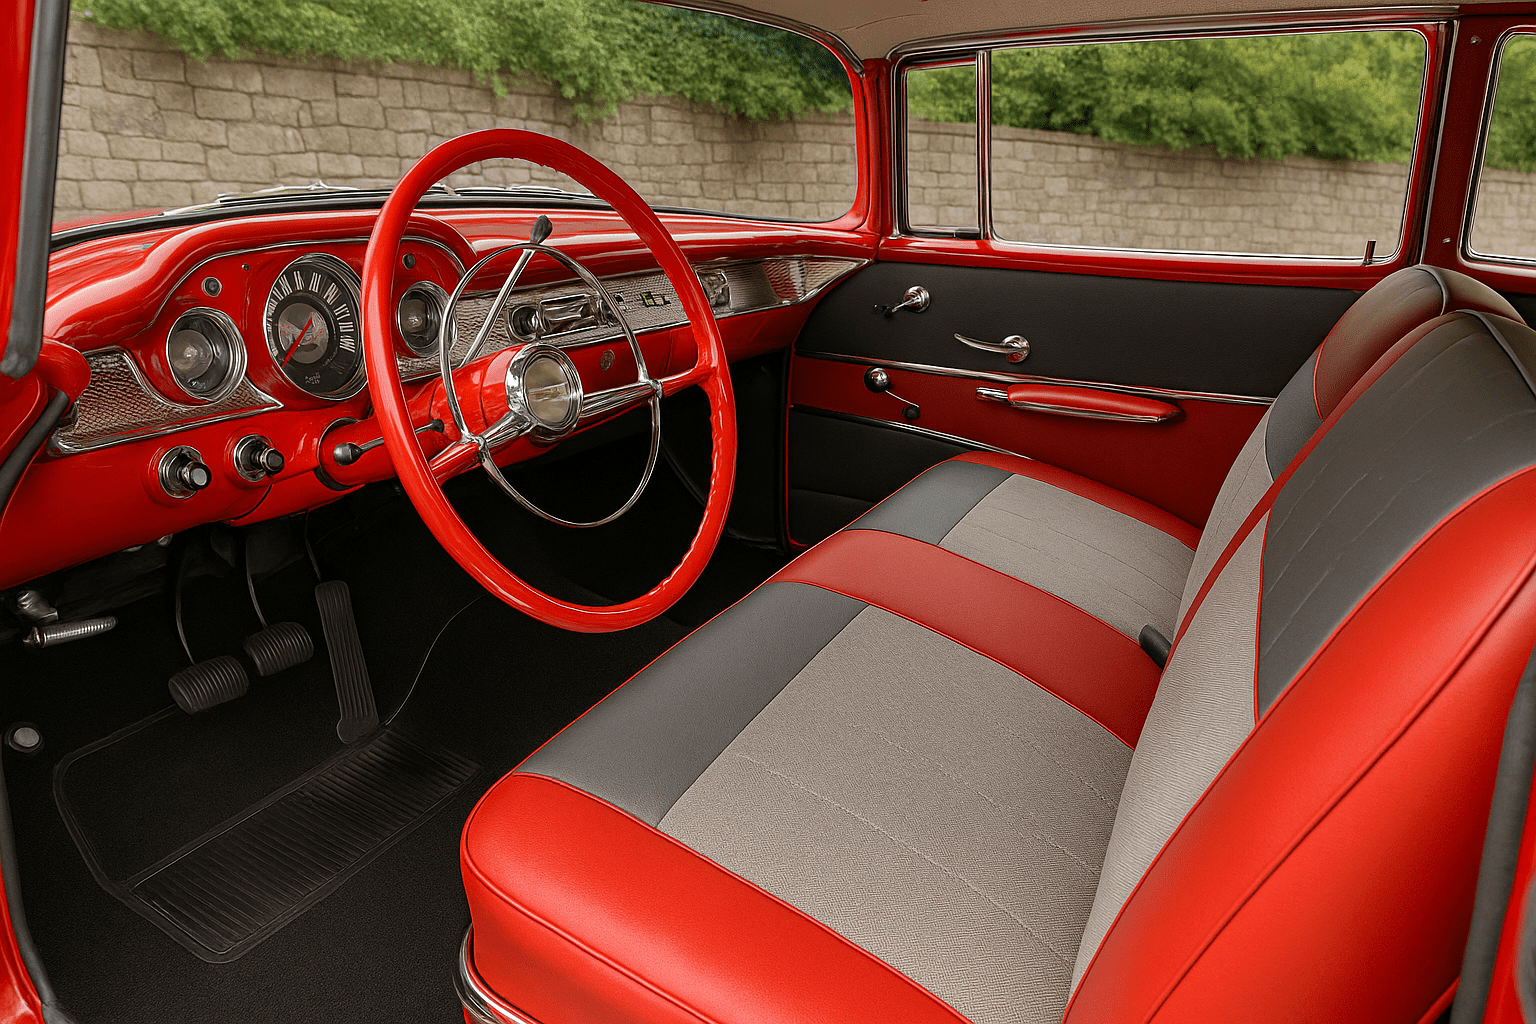
Seats are the first thing you and your passengers notice. For models like the Bel Air, the upholstery patterns were unique and are often a deciding factor in the car’s value.
Bel Air Upholstery Restoration
For Bel Air upholstery restoration, authenticity matters. Original-style vinyl and cloth kits are available, and using the correct pattern can increase your car’s appraisal—something you can double-check with the Classic Chevy Value Estimator.
When redoing seats:
- Strip the old covers carefully and save hardware.
- Replace or rebuild the foam to restore support.
- Stretch and fit new reproduction covers tightly to avoid wrinkles.
For daily drivers, some restorers opt for modern fabrics for comfort, but purists know factory-correct upholstery adds the most value.
Step 3: Dash Repairs and Detailing
The dash is the centerpiece of your Chevy’s interior. Impalas in particular often suffer from cracked pads, sun damage, or worn bezels.
Impala Dash Repair
When performing Impala dash repair, you have options ranging from budget-friendly to concours-level:
- Dash cap covers: An inexpensive fix that hides cracks.
- Pad replacements: A full restoration with factory-correct materials.
- Instrument cluster refresh: Clean gauges, polish bezels, and replace bulbs.
If you’re unsure about originality, decoding your car’s history with the Free Classic Chevy VIN Decoder can guide you in sourcing the correct trim and dash components.
Step 4: Chrome and Interior Trim
Interior trim ties everything together. Door moldings, chrome knobs, and polished bezels set the tone of your cabin. While some pieces can be polished back to life, others may need reproduction or NOS replacements.
For practical tips, guides like Classic Chevy Restoration Tips cover polishing methods and sourcing rare trim pieces. The effort you invest here pays off with an interior that feels complete and period-correct.
Step 5: Interior Finishing Touches
Once the main restoration is complete, add finishing details that make your Chevy’s cabin shine:
- Fresh carpeting with sound-deadening insulation
- Restored steering wheel and horn ring
- Crisp headliner installation
- Authentic accessories like radio knobs, ashtrays, or emblems
The right finishing touches turn a good interior into one that feels factory-new.
Resources for Chevy Interior Restoration
Sourcing quality parts and guidance is critical for success. Two of the most trusted suppliers include:
- Classic Industries Interior Parts – Factory-correct dash pads, upholstery kits, and trim.
- Hemmings Classic Car Marketplace – A hub for original Chevy parts, restoration services, and vintage inspiration.
Pairing these with step-by-step tutorials ensures your project stays on track.
Chevy Interior Restoration
A well-done Chevy interior restoration combines craftsmanship with authenticity. Whether you’re tackling Bel Air upholstery restoration or navigating Impala dash repair, paying attention to seats, trim, and small details ensures your Chevy looks and feels as it did decades ago.
When you climb inside a fully restored interior, you’re not just driving a car—you’re reliving history, surrounded by craftsmanship that stands the test of time.