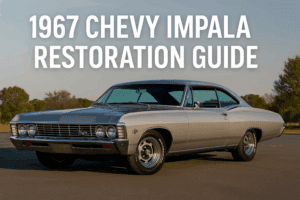
Restoring a classic Chevy is more than just turning a wrench—it’s about reviving American automotive history, preserving craftsmanship, and creating a machine that’s uniquely yours. Whether you’ve just bought a dusty barn-find or inherited a family treasure, a Chevy project car can be both challenging and rewarding. This comprehensive Chevy restoration guide will walk you through every stage of the process—from planning and disassembly to painting, reassembly, and final touches.
Why Choose a Classic Chevy?
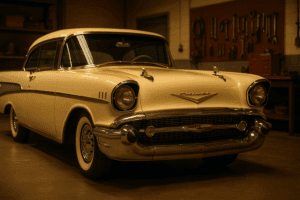
Chevrolet has been an iconic American brand since the early 20th century, producing models that enthusiasts still treasure today. Cars like the Bel Air, Camaro, Impala, and the rugged Chevy trucks embody style, power, and nostalgia. Their availability of parts, strong community support, and timeless design make them perfect candidates for restoration.
If you’re considering a classic Chevy restoration, you’ll join a long tradition of builders who breathe new life into steel and chrome while keeping automotive history alive.
Step 1: Planning Your Chevy Project Car
Before diving into wrenches and welders, take time to carefully plan your build.
- Set Your Goals – Do you want a factory-accurate restoration, a weekend cruiser, or a restomod with modern performance upgrades?
- Budget Realistically – Costs can range from a few thousand to six figures, depending on condition and scope.
- Timeline – Decide if this is a one-year project or a multi-year build. Many restorations take longer than expected.
- Workspace – A clean, organized garage with adequate lighting and storage is essential.
📖 Additional Reading: The Ultimate Classic Chevy Restoration & Maintenance Guide – Learn what to look for when purchasing your project car.
Step 2: Inspection and Documentation
When you first bring home your Chevy project car, resist the urge to immediately tear it apart. Instead:
- Inspect Thoroughly – Check body panels, floors, frame rails, and suspension for rust.
- Photograph Everything – Pictures will serve as a roadmap when reassembling.
- Catalog Parts – Bag and label bolts, clips, and trim pieces.
Many restorers also keep a dedicated notebook or use software to track progress. Documenting your Chevy restoration guide step by step avoids headaches later.
Step 3: Disassembly Process
Disassembly is the first big step where patience pays off.
- Remove trim, bumpers, and chrome carefully.
- Take out seats, carpets, and the headliner.
- Disconnect the drivetrain (engine, transmission, driveshaft).
- Strip wiring harnesses and gauges.
- Remove suspension, steering, and brake components.
Always keep hardware grouped with its components. For example, store all bolts for the front fender in a labeled bag.
Step 4: Addressing Rust and Bodywork
Rust is the enemy of any vintage car. Common Chevy problem areas include:
- Floor pans
- Trunk pans
- Lower fenders
- Rocker panels
- Wheel arches
- Cab corners
Cutting out rust and welding in patch panels is often required. When restoring a classic Chevy, invest in quality replacement panels—many suppliers still produce OEM-style sheet metal.
External resource: Eastwood’s Auto Body Repair Guides offer excellent tutorials on rust repair, welding, and metal finishing.
Step 5: Engine and Drivetrain Restoration
The heart of any Chevy is its engine. Depending on your goals, you can:
- Rebuild the Original Engine – Perfect for purists.
- Upgrade to a Crate Engine – GM Performance offers modern V8s with more horsepower and reliability.
- Transmission Choices – Rebuild the stock transmission or upgrade to an overdrive unit for better drivability.
For suspension and brakes, consider whether you want factory-style rebuilds or modern upgrades like disc brakes and coil-overs.
📖 Related: Best Tools for Classic Chevy Restoration Projects – Step-by-Step Classic Chevy Engine Rebuild Basics.
Step 6: Electrical and Wiring
Classic Chevys often suffer from brittle wiring. For safety and reliability:
- Replace the wiring harness entirely (aftermarket kits are available).
- Upgrade to modern fuses and relays where possible.
- Ensure proper grounds to prevent electrical gremlins.
Adding modern conveniences—such as air conditioning, power windows, or upgraded stereo—may require wiring modifications.
Step 7: Interior Restoration
The interior sets the mood every time you slide behind the wheel. Key steps include:
- Seats and Upholstery – Reupholster in factory patterns or upgrade with custom leather.
- Dash and Gauges – Repair or replace cracked dashes; refurbish original gauges.
- Carpet and Headliner – Pre-cut kits make installation easier.
- Trim and Panels – Clean or re-chrome interior trim pieces.
📖 Related: Interior Restoration Tips for Bel Airs and Impalas – How to Restore a Classic Chevy Interior: Seats, Dash & Trim
Step 8: Paint and Finishing Touches
Paint is often the most expensive stage of a Chevy restoration. Steps include:
- Body filler and block sanding for a smooth surface.
- Primer application.
- Base coat and clear coat spraying.
- Wet sanding and buffing for a show-quality shine.
For authenticity, choose a factory-correct paint code. For creativity, custom colors and graphics can make your project stand out.
External resource: PPG Automotive Paints offers guidance on color selection and refinishing products.
Step 9: Reassembly
Reassembly is like a giant puzzle. Work methodically:
- Install suspension and drivetrain first.
- Route wiring harnesses before the interior trim.
- Carefully align panels and chrome.
- Install weatherstripping to prevent leaks.
This is where your documentation and labeled parts bags will save enormous time.
Step 10: Testing and Fine-Tuning
Once assembled, your Chevy project car isn’t quite ready for the road. Testing is essential:
- Engine Break-In – Follow proper procedures for rebuilt engines.
- Brake Testing – Confirm safe stopping power.
- Suspension Tuning – Adjust ride height and alignment.
- Electrical Systems – Test all lights, gauges, and accessories.
Only after passing all checks should you confidently drive your restored Chevy.
Tips for First-Time Restorers
- Start Small – A pickup or sedan may be easier than a rare performance model.
- Join a Community – Chevy forums and local clubs provide invaluable advice.
- Don’t Rush – Quality takes time; shortcuts often lead to regrets.
- Celebrate Milestones – Every completed stage is an achievement worth recognizing.
📖 Related: Common Chevy Restoration Mistakes and How to Avoid Them – Understand your car’s history before diving into restoration.
Cost Breakdown: What to Expect
- Body & Paint – $5,000–$20,000
- Engine & Drivetrain – $3,000–$15,000
- Interior – $2,000–$10,000
- Miscellaneous – $1,000–$5,000
These numbers vary widely based on DIY work vs. professional services.
Preserving Value vs. Personalization
Classic Chevys can be restored in two primary directions:
- Factory Original Restoration – Maintains authenticity and often higher resale value.
- Restomod Approach – Adds modern performance, comfort, and safety while sacrificing originality.
Neither is wrong—it depends on your goals. Many enthusiasts find joy in blending old-school looks with modern reliability.
Enjoying the Journey
Restoring a classic Chevy is as much about the process as the finished product. The countless hours spent in the garage, the satisfaction of solving mechanical puzzles, and the pride of cruising down the road in a machine you rebuilt are priceless.
Whether your Chevy project car ends up as a concours-level showpiece or a weekend driver, the journey will leave you with skills, stories, and connections that last a lifetime.
Classic Chevy Restoration
A classic Chevy restoration is an ambitious but rewarding project. With planning, patience, and passion, you can transform a rusted shell into a gleaming masterpiece. Use this Chevy restoration guide as your roadmap, tap into the community of fellow enthusiasts, and never lose sight of why you started: to keep the spirit of classic Chevrolets alive for generations to come.