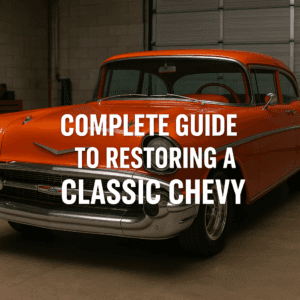
By OldChevys.com — Your trusted source for Classic Chevy restoration guides, parts, and tips.
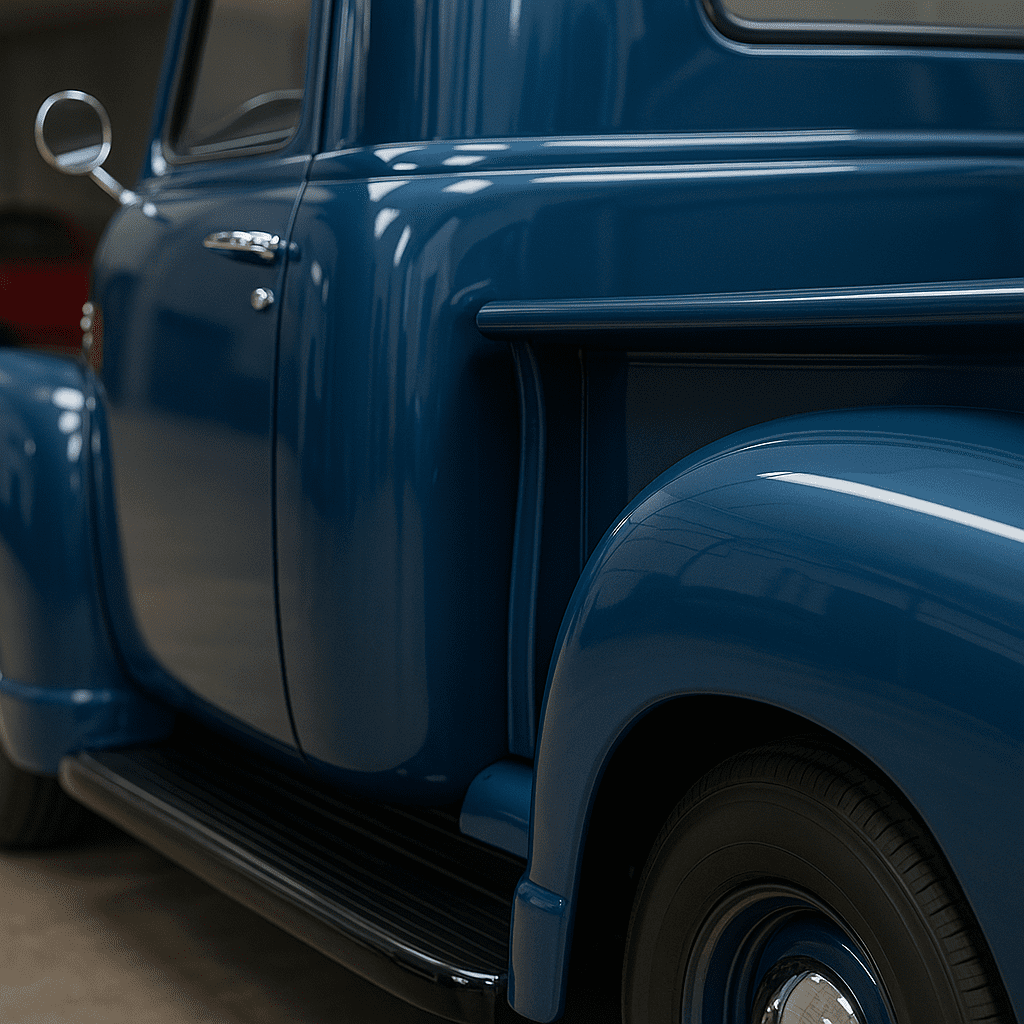
Among the most iconic classics of the 1947–1955 era, the Chevrolet 3100 pickup is beloved for its style and durability. Yet even these tough trucks have weak spots, and none is more common than the cab corners. Over time, moisture and road debris make this area especially prone to rust. For anyone tackling a restoration, learning how to replace a Chevy truck cab corner is essential.
This guide walks you through every step of a Chevy 3100 cab corner replacement—why the panels rust, how to spot damage, and how to cut, weld, and finish your truck’s bodywork like a pro.
Table of Contents
Why Cab Corners Rust on Classic Chevy Trucks
The cab corners on a 1947–1955 Chevy truck sit low on the body, directly in the path of water, salt, and dirt. Their overlapping seams also trap moisture, making rust almost inevitable. Even well-preserved trucks often show bubbling paint or hidden corrosion in this area.
That’s why replacing advance design Chevy truck cab corner patch panels is one of the most common and necessary steps in a vintage Chevy truck restoration. With fresh steel, your pickup not only looks better but also regains its structural integrity.
Identifying a Rusted Cab Corner
Before committing to a full cab corner rust repair, you’ll want to confirm the extent of the damage. Warning signs include bubbling paint, soft spots when pressed, or pinholes that expand with a tap of the hammer.
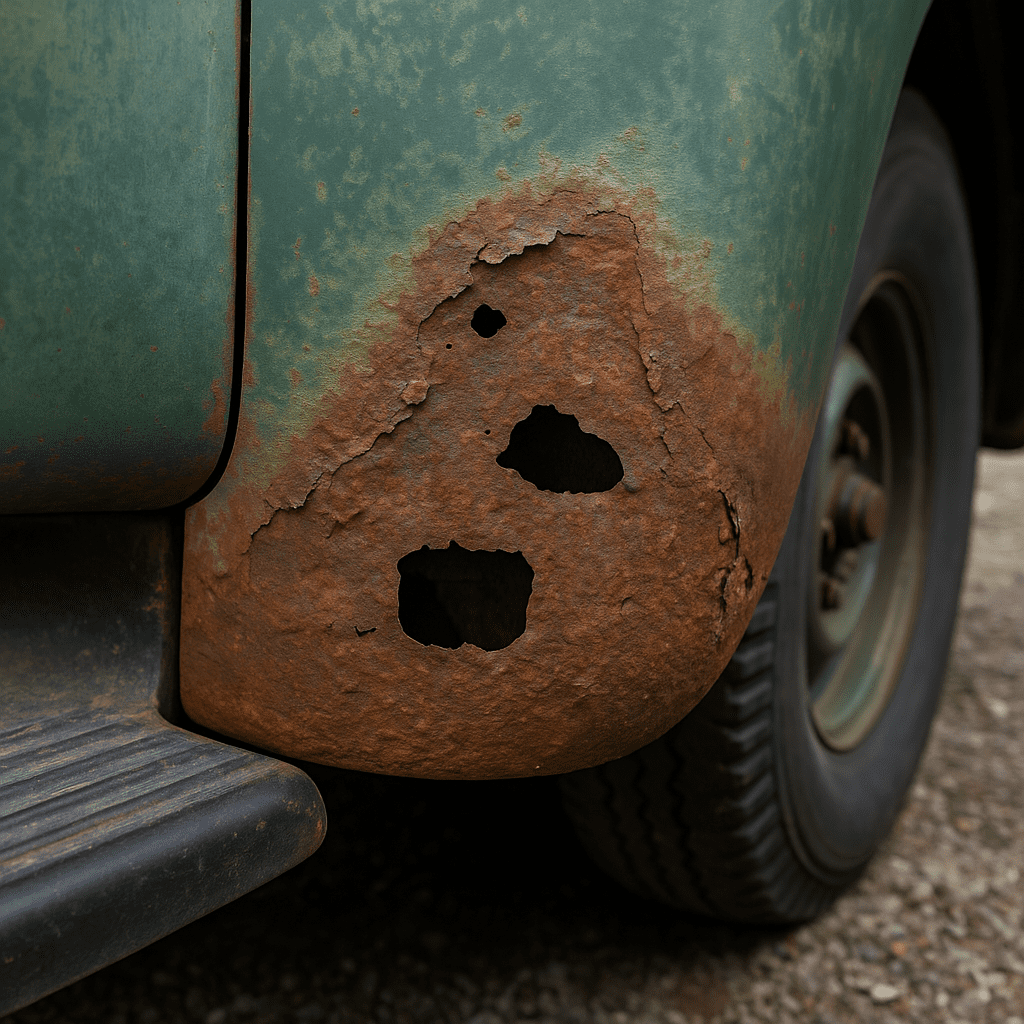
If your advance design Chevrolet 3100 cab corner shows these symptoms, patch panels are the only lasting solution. This is also a great time to inspect related areas like the rocker panels and floor pans, since they often corrode together.
Tools and Materials You’ll Need
A successful adbance design Chevy truck cab corner replacement requires more than just a replacement panel. You’ll need:
- Cab corner patch panel (specific for 1947–1955 Chevy pickups)
- Spot weld cutter and angle grinder
- MIG welder with shielding gas
- Body hammer and dolly set
- Rust inhibitor and weld-through primer
- Body filler, sandpaper, primer, and paint
Using reproduction parts from suppliers like LMC Truck ensures a proper fit and saves time during installation.
Step-by-Step: Cab Corner Replacement
1. Preparation
Before cutting into your vintage Chevy, preparation is everything. Start by disconnecting the battery and removing any interior trim that could be affected by sparks or heat. On a Chevy 3100 cab corner replacement, it’s common to pull the seat out for extra room to work. Carefully mark your cut lines with painter’s tape or chalk so you remove only the damaged section of the panel. Double-check alignment with the rocker panel and door gaps, since the cab corner ties directly into those body lines.
2. Cutting Out the Old Panel
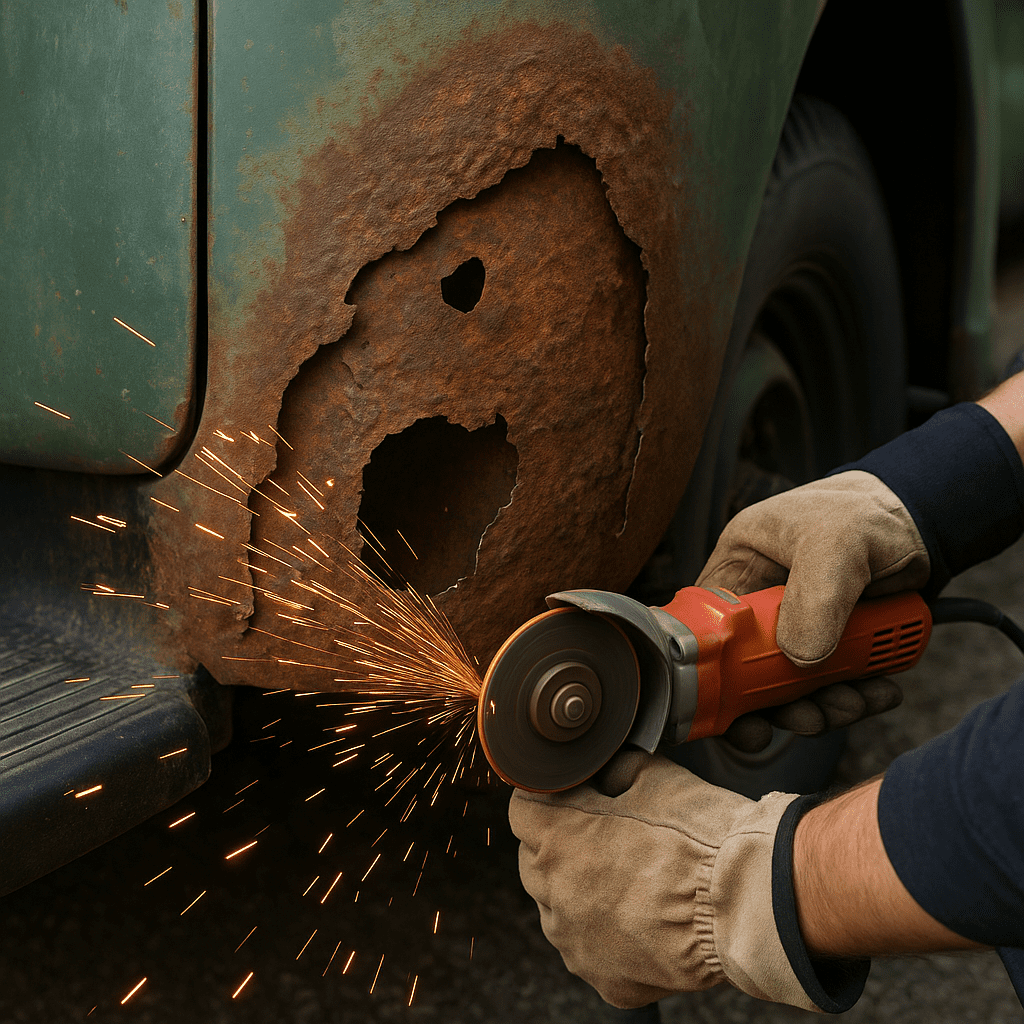
When it comes to cab corner rust repair, precision is key. Use an angle grinder with a cutoff wheel to carefully slice along your marked lines. A spot weld cutter will help you separate the old panel from the cab without damaging surrounding steel. Take your time here — it’s better to cut small and test fit later than to remove too much material. On many 1947–1955 Chevy trucks, rust spreads farther inside than it looks on the surface, so be prepared to clean back to solid, shiny metal.
3. Fitting the Replacement Panel
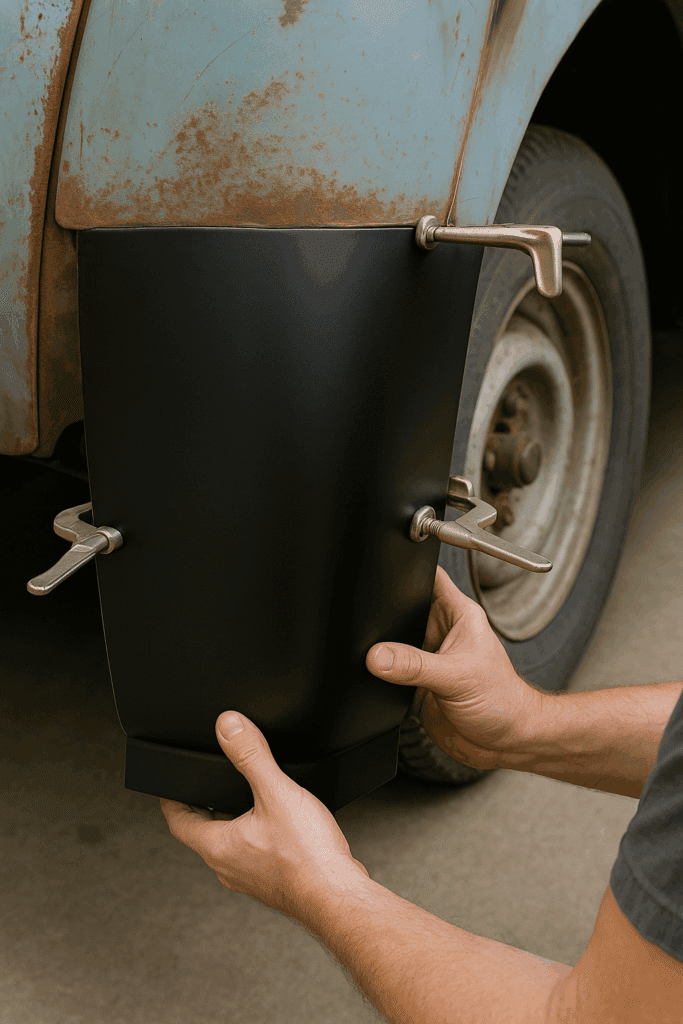
Reproduction cab corner patch panels are designed for the Chevrolet Advance Design body style, but they may not drop in perfectly. Test fit the new panel by clamping it into place, then close the door to check for even spacing. Look carefully at the rocker panel and lower cab line to ensure a seamless transition. In some cases, you may need to trim edges or hammer slight adjustments for a snug fit. Taking the extra time to get the panel aligned now saves major headaches when it comes time to weld.
4. Welding the Panel
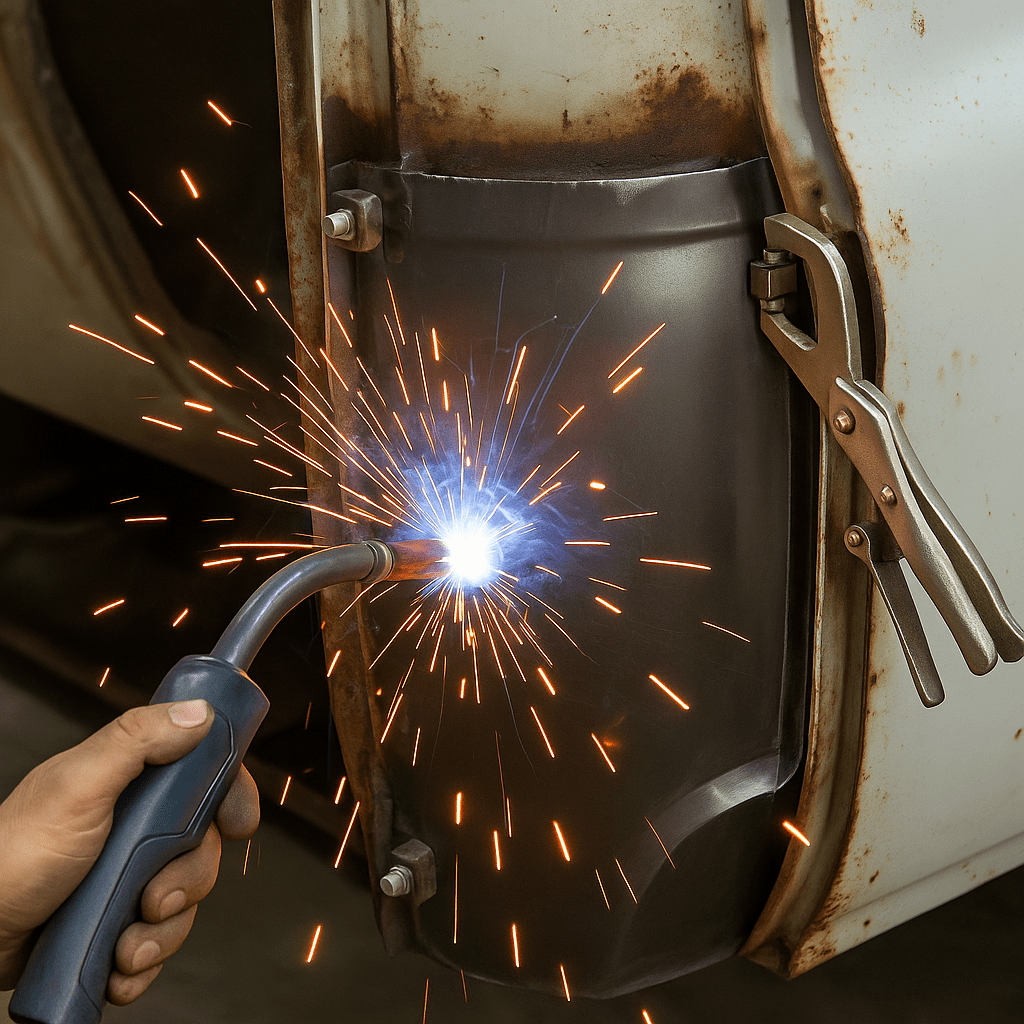
Welding is where your Chevy 3100 restoration really starts to take shape. Apply weld-through primer to the bare metal edges, then tack weld the cab corner into position. Use short, staggered welds to minimize heat buildup and prevent warping the cab. Many restorers choose to stitch weld in small sections, letting the panel cool between passes. Once the panel is secure, grind the welds flush for a smooth surface. A strong weld not only restores the truck’s structure but also ensures your Chevy cab corner repair looks professional once painted.
For welding techniques and recommended repair practices on vehicle body panels (including cab corners), refer to GM’s Best Practices Guideline Manual.
5. Finishing Work
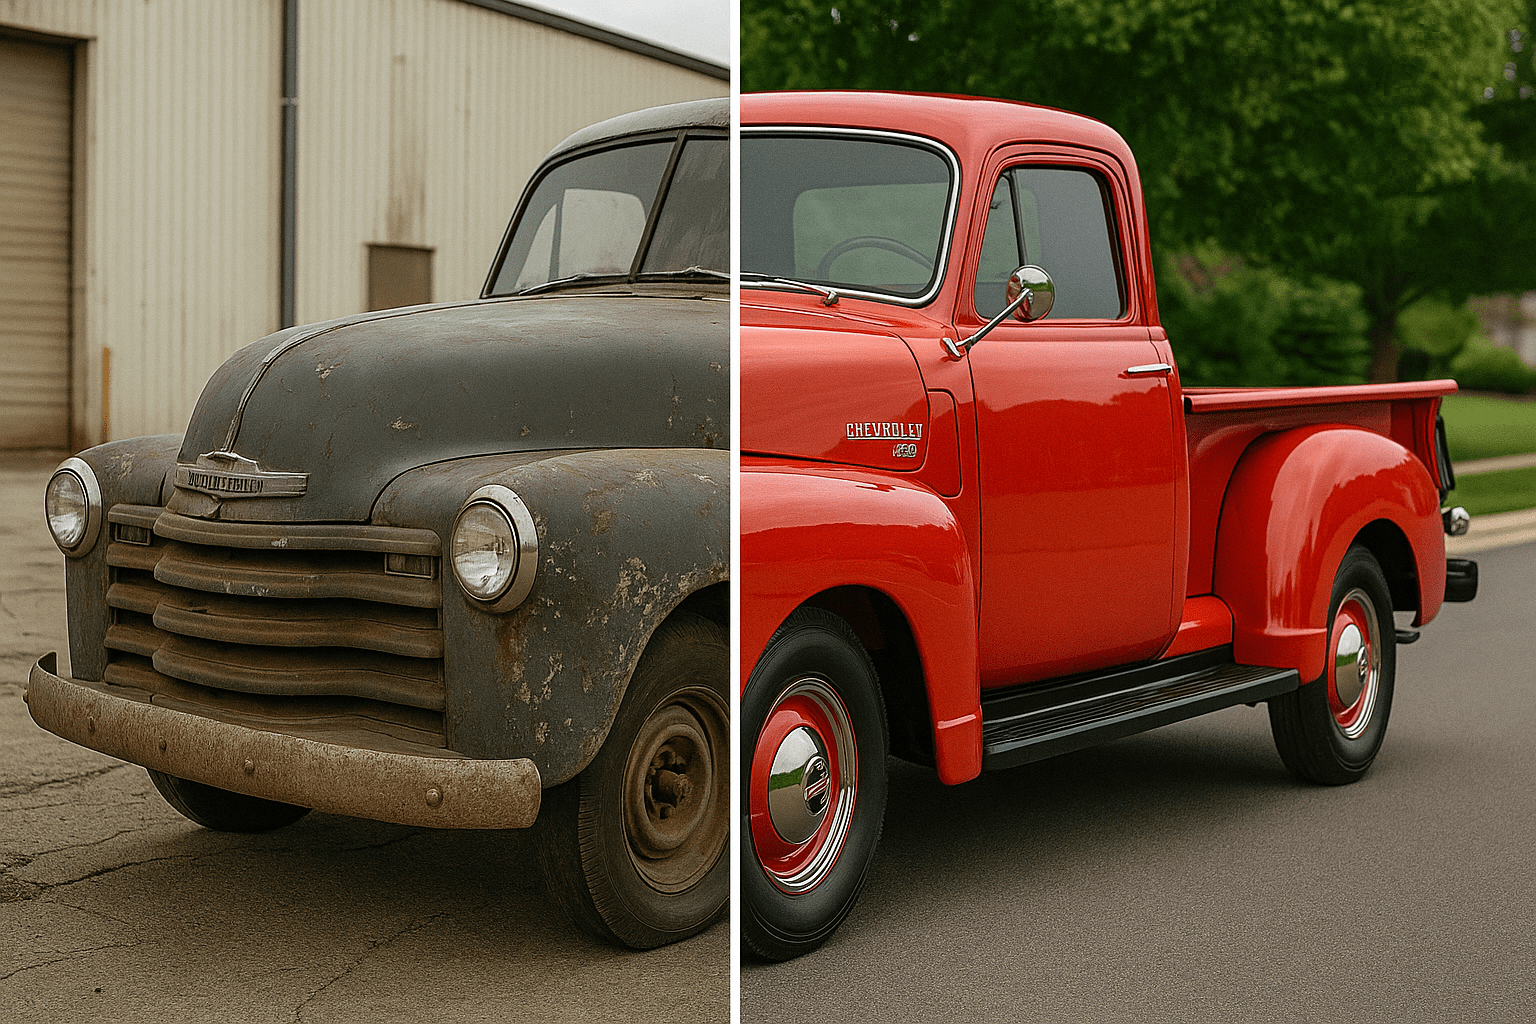
The finishing stage brings your project from “repaired” to “restored.” Coat the inside of the cab corner with rust inhibitor to stop future corrosion. Apply body filler sparingly over the welded seams and sand smooth until the transition between old and new steel is invisible. Once primed, the cab corner is ready for paint — ideally matching the original factory color of your 1947–1955 Chevrolet truck. With careful finishing, your cab corner replacement will blend seamlessly into the body, protecting your classic Chevy for decades to come.
Tips for Success
- Always check door alignment before final welding.
- Replace both corners if one is already rusted — it saves time and ensures balance.
- Choose OEM-style patch panels for the most authentic fit on your classic Chevy truck restoration.
Cost of Cab Corner Replacement
Panels range from $40–$120 each, with professional labor costing $300–$600 per side. DIY enthusiasts save significantly, though you’ll need welding skills and patience. Either way, cab corner rust repair adds long-term value to your Chevy 3100 pickup.
Related Restoration Projects
Replacing cab corners often goes hand-in-hand with other repairs. Rocker panels, floor pans, and lower cowls are common rust zones. Check out our The Ultimate Classic Chevy Restoration & Maintenance Guide for detailed instructions on aligning these panels correctly.
The Foundation of a Solid Restoration
For anyone restoring a 1947–1955 Chevrolet 3100, replacing cab corners is a must. It’s one of the most common repairs, and doing it right ensures your truck stays strong and looks sharp. Whether you’re building a showpiece or a reliable driver, proper cab corner replacement is the foundation of a solid restoration.
If you’re shopping for one of these trucks, our Advance Design Chevy Trucks (’47–’55) guide will help you spot rust-prone areas before you buy. And if you’re already knee-deep in your project, tackling cab corner patch panels will keep your vintage Chevy on the road for decades to come.
Frequently Asked Questions (FAQ)
What years are covered by Advance Design Chevy trucks?
Advance Design Chevy trucks were produced from 1947 through early 1955. These models include the popular 3100 half-ton pickup, which is one of the most commonly restored classic Chevrolets today.
Why do cab corners rust so badly on Chevy 3100 trucks?
Cab corners on 1947–1955 Chevy trucks are exposed to road debris, water, and salt spray. Their design allows dirt and moisture to collect inside, making cab corner rust repair a common step in any restoration project.
Do I need to replace both cab corners at the same time?
It’s highly recommended. If one cab corner patch panel is rusted through, the other is usually not far behind. Replacing both ensures symmetry, strength, and saves time on alignment.
How much does it cost to replace a Chevy 3100 cab corner?
Cab corner panels typically cost $40–$120 each. Professional labor can add $300–$600 per side. DIY restorers can save money by welding in their own Chevy cab corner repair panels with the proper tools.
Can I replace cab corners without welding?
While some restorers use adhesives or rivet-on panels, welding is the strongest and most authentic method for a Chevrolet 3100 pickup body repair. Welded seams restore structural integrity and give the cleanest finish.
Where can I buy quality cab corner patch panels for my truck?
Several classic Chevy parts suppliers carry them. LMC Truck and Classic Industries both offer reproduction Chevy 3100 cab corner replacement panels designed to fit 1947–1955 models.