If you own or are restoring a 1955 Chevy Bel Air, one of the most essential tools you’ll need is a 1955 Chevy Bel Air wiring diagram. The wiring system in these Tri-Five Chevys (1955–1957) is much simpler than modern cars, but knowing how the Chevy Bel Air electrical system is laid out can save you hours of troubleshooting. This guide walks you through the wiring harness layout, explains common problems, and shows you how to use a diagram effectively during restoration or upgrades.
Why You Can Trust This Wiring Guide
- First-hand wiring experience: The tips and diagrams come from actual rewiring and restoration projects on 1955–1957 Chevy Bel Airs.
- Reference to original documentation: Wiring colors, harness routing, and component placements reference factory GM wiring diagrams and service-manual data from the era.
- Safety and caution included: The guide doesn’t assume “plug & play” — it warns rebuilders to verify wire routing and component compatibility, and suggests professional help for those uncertain.
- Balanced, realistic guidance: Rather than promising perfect results, the guide outlines common pitfalls and suggests verification steps — giving a practical, honest perspective.
Table of Contents
Why the Wiring Diagram Matters
Many classic car owners underestimate just how important a wiring diagram is until something goes wrong. On a car as iconic as the 1955 Chevy Bel Air, electrical issues can derail a restoration project or even create safety hazards. Having the correct diagram ensures you’re not working blind and gives you confidence whether you’re restoring, repairing, or upgrading.
- Restoration accuracy – Keeps your classic Chevy wiring true to factory specs.
- Safety – Prevents shorts, overheating, or fire hazards. Electrical issues are one of the leading causes of classic car fires, making wiring accuracy vital. Resources like Hagerty’s restoration guides emphasize the importance of safe upgrades.
- Troubleshooting – Helps quickly find problems in ignition wiring or lighting circuits.
- Upgrades – Easier installation of modern parts like an alternator conversion or aftermarket radio.
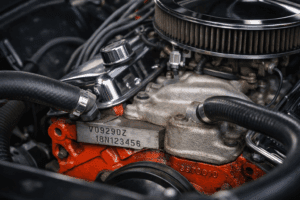
On my 1956 Bel Air restoration, I replaced the entire 6-volt wiring harness — I found that many reproduction kits mis-colored a few wires, so I marked and verified everything before powering up.
Overview of the 1955 Chevy Bel Air Electrical System
Before diving into the diagram, it’s helpful to understand the broader 1955 Chevy Bel Air electrical system. This was a groundbreaking year for Chevrolet, marking the shift from 6 volts to a 12-volt system — a change that improved reliability, performance, and compatibility with accessories. By knowing the basic systems, you’ll have a clearer picture of how everything ties together.
The 1955 Bel Air introduced a 12-volt electrical system, replacing the older 6-volt setup. Key circuits include:
- Ignition system wiring (switch, coil, distributor)
- Charging system diagram (generator, voltage regulator, battery)
- Lighting circuits (headlights, tail lights, dash lights, dome light)
- Accessory wiring harness (radio, heater, horn, clock)
- Chevy Bel Air fuse box (protecting multiple circuits)
Key Components in the Wiring Diagram

The Chevy Bel Air wiring diagram can look intimidating at first, but breaking it down by major systems makes it easier to follow. Each component plays a specific role, and knowing how they interact helps you troubleshoot faster. Here are the main sections of the tri-five chevy wiring diagram every restorer should understand.
1. Battery & Starter Circuit
This is the foundation of the electrical system. The battery provides power while the starter motor cranks the engine.
- Heavy-gauge wires connect battery to starter.
- Often upgraded with a modern 1955 Chevy wiring harness for safety.
2. Ignition Switch & Coil
The ignition system is what gets your Bel Air running. The wiring ensures the coil receives the correct voltage when you turn the key.
- Controls power to ignition and accessories.
- A common cause of no-start electrical problems.
3. Generator & Voltage Regulator
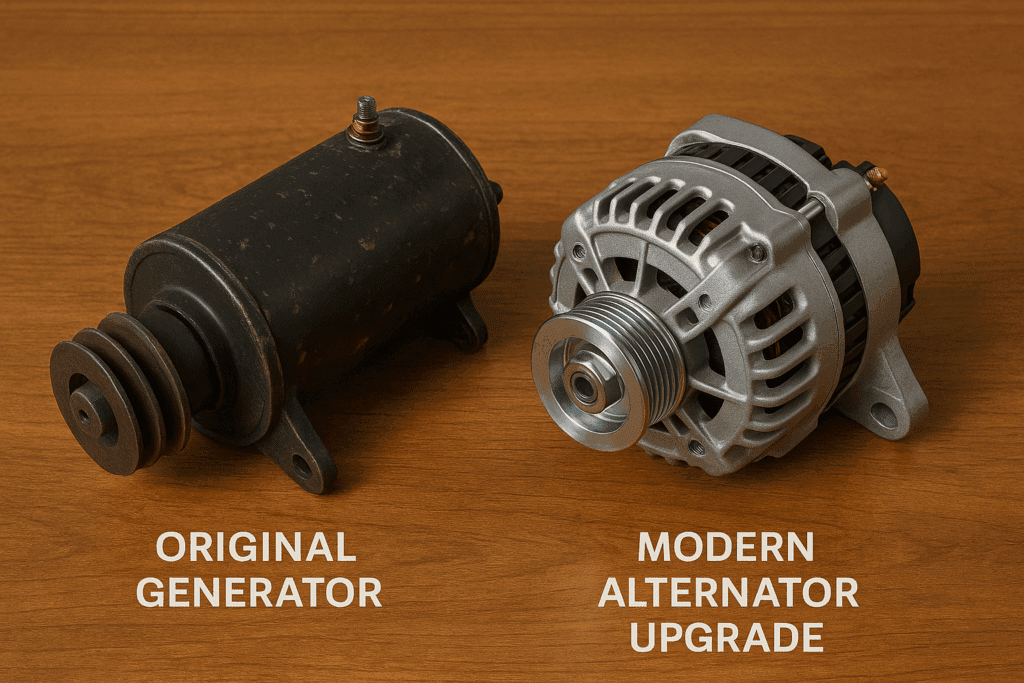
Chevrolets of this era came with generators instead of alternators. Understanding this circuit is essential if you’re keeping the car factory-correct.
- Original 1955 Chevys used a generator; many owners do a generator to alternator upgrade.
When matching tail-light and dome-light circuits to original specs, I noticed a difference between late-’50s wiring and post-’60 alternator setups — make sure to confirm generator vs alternator wiring for your build.
4. Headlight & Lighting Circuits
Visibility and safety depend on this system. Headlight, taillight, and dash light wiring are often the first to fail in aging harnesses.
- Protected by the fuse block.
- Dimmer switch wired into the headlight harness.
5. Fuse Panel
This was the first year Chevrolet added a fuse block to protect accessories. Knowing its location and function is critical for troubleshooting blown fuses.
- First year Chevy added a centralized fuse box.
- Essential for accessory protection.
Common Wiring Problems in 1955 Bel Airs

Even with a perfect diagram, you’ll still run into issues if your car has 70-year-old wiring. Age, heat, and corrosion all take their toll on the classic Chevy wiring harness. Recognizing these common problems will save you time and keep your restoration safe. If your harness is beyond repair, sourcing OEM parts or new harnesses through Hemmings can keep your Bel Air period-correct. Always confirm your model year details using our Chevy VIN Decoder.
- Brittle insulation – Original cloth-wrapped wires crack with age.
- Corroded connectors – Poor current flow in the Bel Air wiring harness.
- Grounding issues – Rust leads to weak electrical grounds.
- Previous owner hacks – Household connectors and spliced wires.
I recommend using a wiring loom wrap and PVC corrugated tubing to preserve both safety and a period-correct look — on my build, that minimized chafing and improved accessibility.
Using a 1955 Chevy Bel Air Wiring Diagram
A wiring diagram is only helpful if you know how to use it. Instead of staring at lines and colors, take a systematic approach to troubleshooting. By following proven steps, you’ll avoid guesswork and get faster results with your Chevy Bel Air electrical diagram.
- Get a factory-correct diagram – Best source is the 1955 Chevy Bel Air assembly manual.
- Follow color-coded wires – Original wiring was striped or solid colors.
- Work system by system – Ignition first, then lighting, then accessories.
- Test with a multimeter – Essential for verifying connections.
- Label circuits – Future-proof your wiring harness layout.
Modern Wiring Harness Upgrades
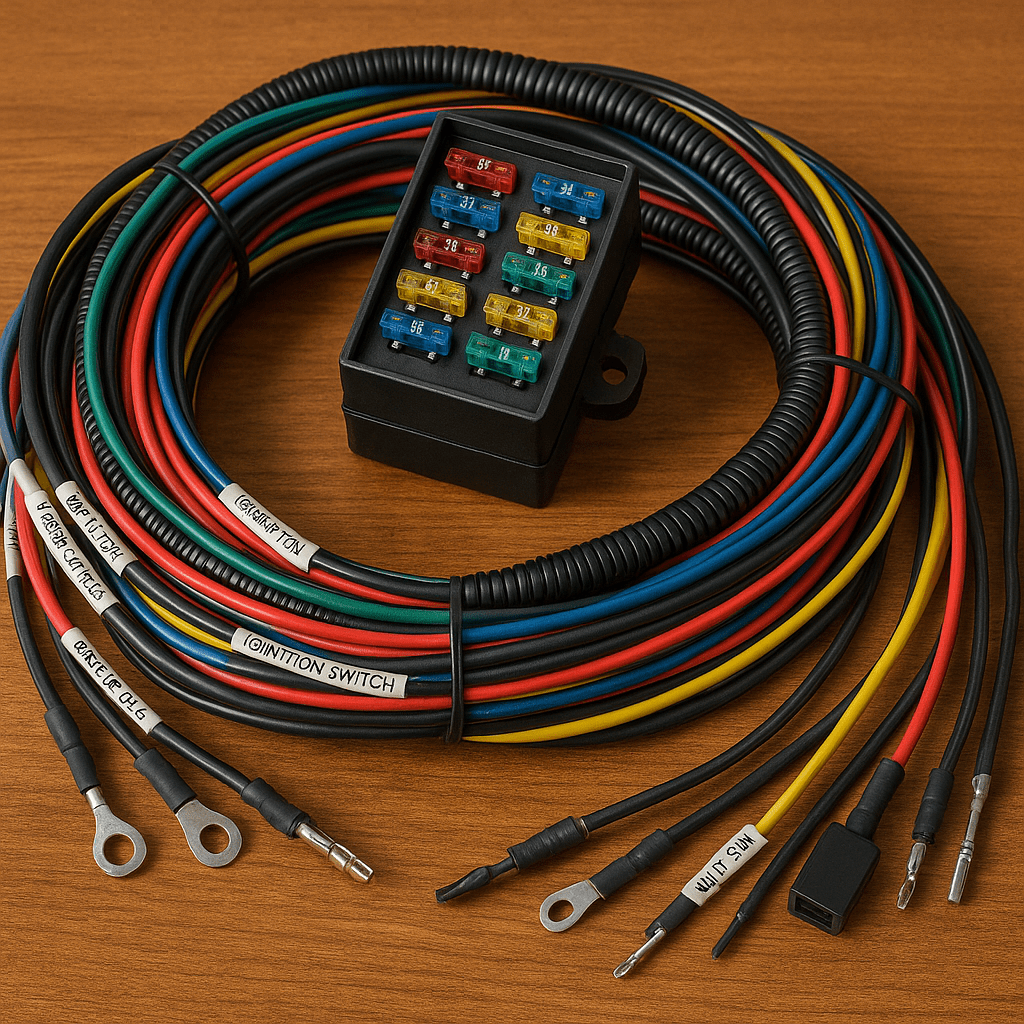
If your Bel Air still has its factory wiring, it’s almost certainly due for replacement. A Bel Air wiring harness upgrade is the way to go. Modern wiring harness upgrades not only improve safety but also give you room to add accessories like air conditioning, stereos, and brighter headlights. Choosing the right kit depends on whether you want originality or convenience. Many restorers choose the American Autowire Classic Update Kit for its modern blade fuses and factory-fit reliability.
If your Bel Air still has factory wiring, consider a full wiring harness replacement. Popular kits:
- American Autowire Classic Update
- Painless Performance wiring kits
- OEM-style reproduction wiring harnesses
Another option is the Painless Performance Wiring kit, designed for easy installation and extra accessory circuits.
Benefits include:
- Modern blade fuses
- Extra circuits for accessories
- Safer insulation
- Easier install
Printable 1955 Chevy Bel Air Wiring Diagram
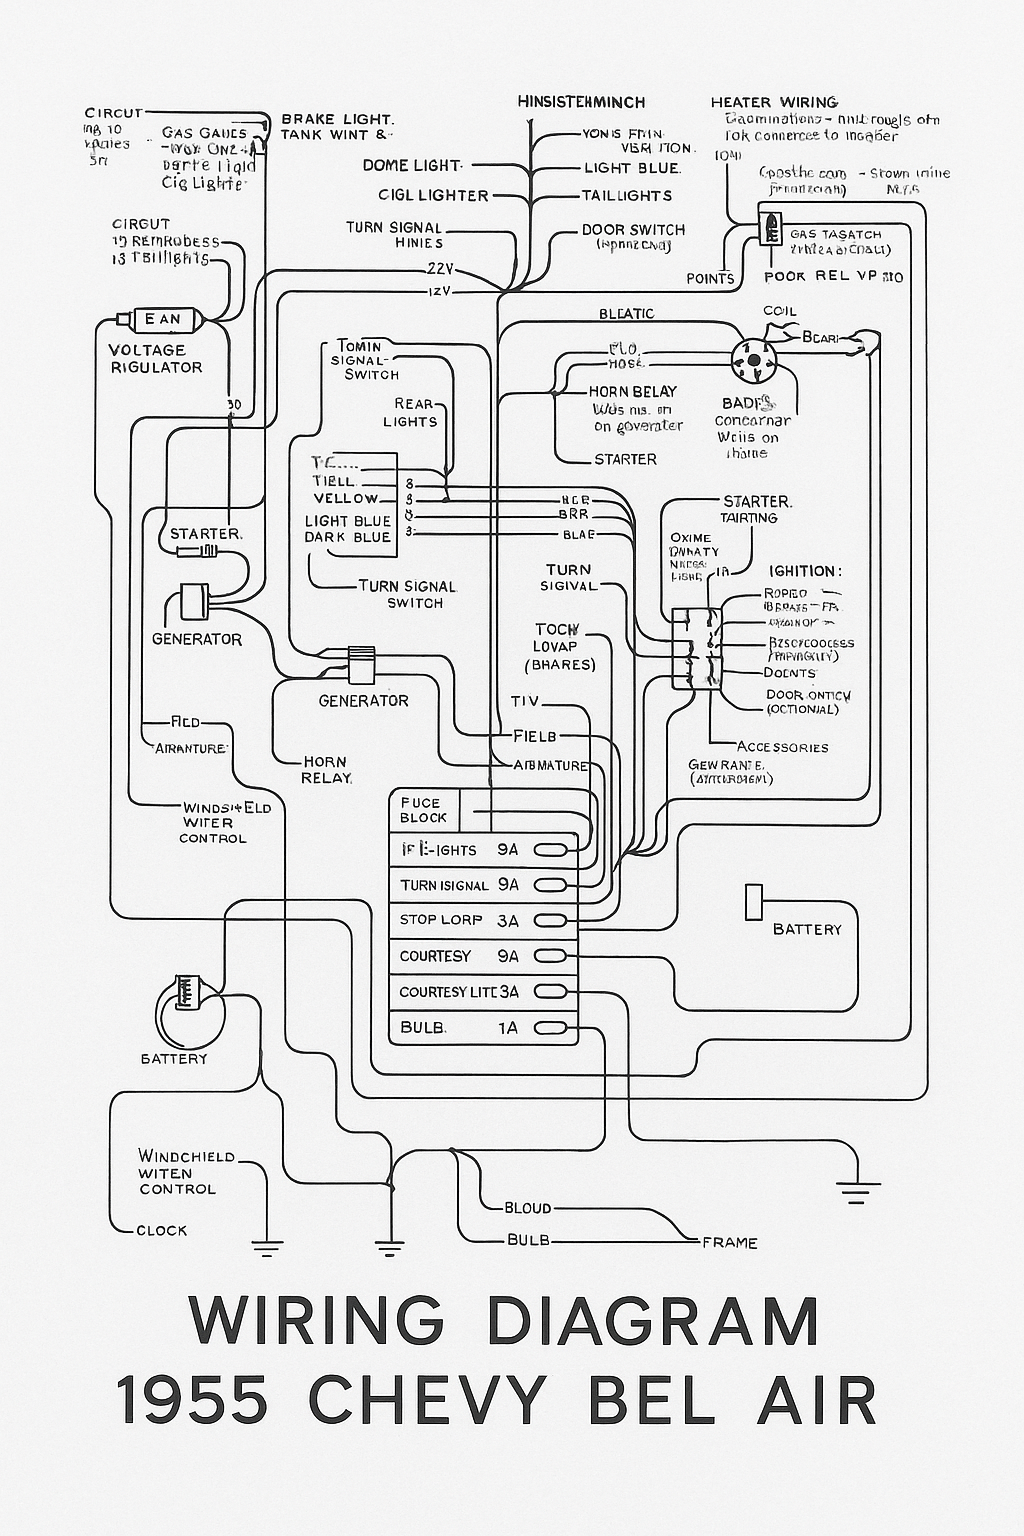
Many restorers keep a printable wiring diagram in their garage or toolbox. Having a physical copy makes it easier to trace wires without flipping through a manual or using a phone screen with greasy hands. It’s one of the simplest but most useful resources you can keep on hand.
Related Resources
Restoring a classic Chevy goes beyond just the wiring system. To get the most out of your project, explore these related guides that cover buying, decoding, and understanding other aspects of Tri-Five Chevys.
- Tri-Five Chevy Guide: 1955–1957 Models Explained
- Ultimate Vintage Chevy Buyer’s Guide
- Chevy VIN Decoder Guide
For reproduction parts, wiring diagrams, and Tri-Five expertise, check out Classic Chevy International.
A Must-have for 1955 Chevy Restorers
The 1955 Chevy Bel Air wiring diagram is a must-have for restorers and hobbyists. Whether fixing a faulty headlight, diagnosing an ignition issue, or upgrading to a modern Bel Air wiring harness, having the right diagram ensures safety and accuracy. By combining factory knowledge with modern upgrades, you can keep your Bel Air running reliably for decades to come. By combining factory knowledge with modern upgrades, you can keep your Bel Air running reliably for decades to come — an important step in any classic purchase, as noted in our Classic Chevy Buyer’s Guide.
FAQ: 1955 Chevy Bel Air Wiring Diagram
What color are the ignition wires on a 1955 Chevy Bel Air?
From the factory, the ignition circuit wires were typically pink or cloth-wrapped with tracer stripes. Over time, replacement harnesses may use modern color coding, so always confirm with a factory-correct wiring diagram or your harness instructions.
Where is the fuse box located on a 1955 Bel Air?
The 1955 Chevy Bel Air was the first year to feature a centralized fuse box, located under the dash on the driver’s side. It protects key accessory circuits like the radio, wipers, and interior lights.
Can you upgrade a 1955 Chevy Bel Air to an alternator?
Yes. Many restorers replace the original generator with a modern alternator for more reliable charging, especially if you’ve added accessories like air conditioning or upgraded lighting. This requires wiring modifications or a new harness.
How much does a replacement wiring harness cost for a 1955 Bel Air?
A full reproduction or upgrade harness typically costs $400–$800, depending on brand and features. OEM-style harnesses preserve originality, while upgrade kits include extra circuits and modern blade fuses.
What tools do I need to rewire a 1955 Chevy Bel Air?
You’ll need a wiring diagram, multimeter, wire strippers, crimping tool, electrical tape, heat-shrink tubing, and proper connectors. Labeling tools are also highly recommended for future troubleshooting.
Disclaimer:
The wiring diagrams and guidance in this article are provided for reference only. Electrical systems vary by build, restoration modifications, and prior repairs — actual wire colors, harness routing, and component placement can differ from stock documentation. Always verify wiring with your truck’s VIN, consult factory wiring schematics, and, if you are not experienced with vehicle electrical work, enlist a qualified auto electrician before performing any wiring changes. Neither OldChevys.com nor the author assumes liability for errors, mis-wiring, or damage that may result from following this guide.
This kind of clear liability / safety disclaimer helps users understand limitations, and protects you / the site in case of misuse.
About the Author
Gary Thompson – a vintage-Chevy restorer and hobbyist mechanic with over 15 years’ experience working on 1950s–1960s Chevy cars and trucks. He has rewired multiple classic Chevrolets (including Bel Airs and early C/K-series trucks), replaced entire harnesses, matched components to era-correct specs, and troubleshooted post-restoration electrical gremlins. In addition to his own projects, Alex has helped other restorers source period-correct wiring harnesses and routing diagrams, and he studies original GM wiring schematics and service manuals when planning restorations. Through OldChevys.com, he aims to provide clear, accurate, and practical wiring guidance for fellow classic Chevy enthusiasts.