Few projects are as rewarding for car enthusiasts as a classic Chevy engine rebuild. Whether you’re tackling the legendary small block V8 or another Chevrolet powerplant, learning the fundamentals can help you restore power, reliability, and pride to your project car. While a complete rebuild requires time, precision, and the right tools, understanding the step-by-step process will guide you confidently from teardown to reassembly.
Table of Contents
Step 1: Planning Your Chevy Engine Rebuild
Every successful rebuild starts with planning. Define your goals before you pull the engine:
- Stock Restoration – For purists restoring a matching-numbers Chevy, accuracy is everything.
- Performance Upgrade – Many builders add mild performance parts during a Chevy V8 rebuild project, such as upgraded camshafts or aluminum heads.
- Reliability Build – If your Chevy project car will be a driver, prioritize durability with high-quality gaskets, bearings, and oiling systems.
Having a clear direction prevents wasted money and ensures you order the correct parts kit for your build.
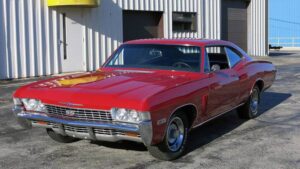
📖 Related: For those still hunting for a project car, our Classic Chevy Buyer’s Guide explains what to look for before committing to a restoration.
Step 2: Engine Removal and Teardown
Once you’ve documented everything under the hood, carefully remove the engine from the car. Label wires, hoses, and brackets to avoid confusion later.
During teardown:
- Remove intake manifold, carburetor, and accessories.
- Pull cylinder heads and exhaust manifolds.
- Drop the oil pan, oil pump, and crankshaft.
- Carefully bag and label bolts, lifters, and small hardware.
The teardown phase isn’t about speed—it’s about documentation. Photos and notes will save time when it’s time to reassemble.
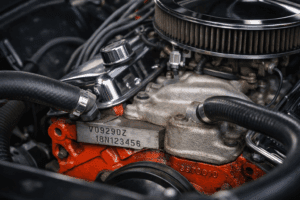
📖 Related: If you’re unsure whether your small block is original, use the Free Classic Chevy VIN Decoder to verify its history.
Step 3: Cleaning and Inspection
Engines accumulate decades of sludge, grime, and carbon buildup. Thorough cleaning is essential:
- Degrease the block and components using solvent tanks or hot tanks.
- Inspect for cracks, scoring, and warping. Use a magnifying glass and a straightedge for accuracy.
- Measure Wear – Micrometers and dial bore gauges determine if parts can be reused or require machining.
Critical areas include cylinder walls, crank journals, and valve seats. If tolerances are out of spec, machining is mandatory.
🔗 Resource: Engine Builder Magazine offers excellent guides on diagnosing wear and tolerances.
Step 4: Machining and Preparation
This step usually requires a professional machine shop. Services may include:
- Cylinder boring and honing
- Crankshaft grinding
- Line honing main journals
- Valve seat machining
- Block decking for flatness
A properly machined block ensures that your rebuild lasts for years. Skipping or cutting corners here will shorten engine life dramatically.
🔗 Resource: Summit Racing provides rebuild kits and connects you with machine shop services tailored for Chevys.
Step 5: Rebuilding the Short Block
With your block back from the shop, it’s time to reassemble:
- Install Main Bearings & Crankshaft – Torque caps to factory specs.
- Fit Pistons & Rings – Use a ring compressor and lubricate generously.
- Check Clearances – Plastigage helps confirm correct tolerances.
- Oil Pump & Pan – Install a quality oil pump before sealing the pan.
The short block is the heart of any restore Chevy small block project. Patience and precision are essential.
📖 Related: Curious how a rebuilt motor affects value? Try our Classic Chevy Value Estimator.
Step 6: Cylinder Heads and Valve Train
Cylinder heads are where horsepower lives. Depending on your goals:
- Stock Heads – Refurbish with new valves, springs, and seals.
- Performance Heads – Consider aluminum aftermarket heads for better airflow.
- Camshaft Selection – Match the camshaft to your driving style and compression ratio.
Proper valve train setup ensures efficiency and prevents costly damage.
🔗 Resource: Jegs High Performance provides in-depth camshaft and cylinder head selection advice for Chevy V8s.
Step 7: Final Assembly and Break-In
Reassembly requires methodical work:
- Install timing set and align cam/crank marks.
- Mount the intake manifold, carburetor (or EFI), and accessories.
- Prime the oil system before the first start.
- Break in the camshaft and rings with proper RPM cycling.
Monitor oil pressure, coolant temperatures, and exhaust color carefully. Change the oil and filter after 500 miles.
Tips for First-Time Chevy Engine Builders
- Get a Factory Service Manual – Specs and torque sequences are vital.
- Buy Quality Parts – Don’t risk failures with bargain gaskets or bearings.
- Be Patient – A careful build always outlasts a rushed one.
- Document Everything – Photos and notes make reassembly smoother.
Classic Chevy Engine Rebuild
A classic Chevy engine rebuild is one of the most satisfying projects you can take on. From teardown to final break-in, each stage strengthens your knowledge while bringing your small block back to life. Whether you’re pursuing originality, modern performance, or weekend reliability, these Chevy V8 rebuild basics will help you build an engine that runs strong for years.
And remember, this is just one part of a much larger journey. For the full picture, check out our Complete Guide to Restoring a Classic Chevy and How to Restore a Classic Chevy Interior — the pillar resource that ties engine work, interiors, paint, and more into a step-by-step roadmap.
Use Our Small Block Chevy Identification Tools
For complete verification, continue with:
- Chevy Small Block Casting Numbers Lookup
- Small Block Chevy Date Code Decoder
- Small Block Chevy Suffix Code Lookup
- Chevy Cylinder Head Casting Numbers Guide
- How to Restore a Chevy Small Block V8